Monday, May 27, 2013

Slutty Brownies


Two months since my last post, pathetic isn't it? Every single time I swear that I will stick to this blog thing, I go strong for a few weeks and then stop again. I wish there was more time in a day. I also wish that the foods I really enjoy making weren't so high in calories. Sweets and carbs don't do much for the ol' wedding dress figure or my weak diet attempts. In a perfect world, I could skip working and spend my days working out, cooking up something for a blog post, eating what I make, working out again, and having dinner on the table by the time Ry got home. Maybe someday, right? A girl can dream! On a super positive note, I am about to be out of school for the summer, which means more time for blog postings...and my never ending list of wedding errands, planning, and purchasing. 

We are almost down to four months now! I can't even believe how fast our big day is approaching. It seems no matter how much I get done, I still have five billion more things to do. Come to think of it, I will have a lot more time for blog postings once this wedding is over. It takes up a huge chunk of my time. I have to say though, I really do love it. Regardless of the stress it causes, or the large amount of money it costs - this whole planning process has truly been fun for me.

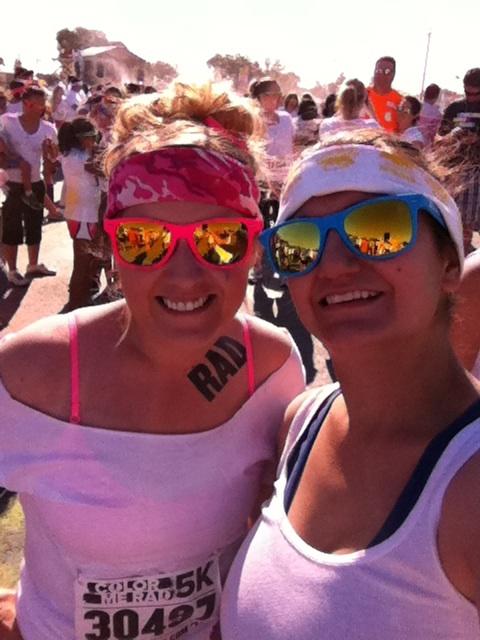
I spent my Memorial Day weekend doing some really fun stuff. Saturday was the "Color Me Rad" run in Tampa. Some of my fellow Kindergarten teacher friends and I participated. I had a blast, aside from my raging inner-cluts coming out and busting my face in front of a huge crowd of people (yes, this really happened and I have numerous bruises to prove it). Check out these rad pictures from the day!


Yesterday Ryan and I spent our day hanging out and BBQing with one of my best friends, her wonderful husband and little girl. I wanted to bake something quick and delicious, so I went with one of the greatest brownie creations of all time - The slutty brownie. Expect your backside to grow with this one friends....


There really are no words for how sinfully amazing these things are. I would literally eat them until I was sick if I thought I'd fit in anything but "fat pants" afterwards. These things cause me major eaters remorse. You know, that sinking feeling of guilt after annihilating something seriously bad for you. Regardless of all that, you want to make these. No, really you do. If you have a party or event to attend, take the twenty minutes to whip these up. If you do, count on being a hit and making lots of new friends.


Slutty Brownies
Adapted from Kevin and Amanda

2 sticks butter, softened
1 cup granulated sugar
3/4 cup dark brown sugar
2 large eggs
1 Tablespoon pure vanilla extract
2 1/2 cups all-purpose flour
1 teaspoon baking soda
1 teaspoon salt
2 cups semi-sweet chocolate chips
1 package Double Stuffed Oreos
1 Family Size (9×13) Brownie mix

Preheat oven to 350 degrees F. Cream the butter and sugars in large bowl with an electric mixer on medium speed for 3-5 minutes. Add the eggs and vanilla and mix well to combine. In a separate bowl, whisk together flour, baking soda and salt. Add flour mixture to creamed mixture slowly until all is incorporated. Stir in chocolate chips. Spread cookie dough in the bottom of a 9×13 baking dish that has been lined with parchment paper and sprayed with cooking spray. Top with a layer of Oreos. Mix together brownie mix. Pour the brownie batter over the cookie dough and Oreos. Cover with foil and bake at 350 degrees F for 30 minutes. Remove foil and continue baking for an 15-25 minutes. Let cool completely before cutting.

Sunday, March 24, 2013

Chocolate Junk Cookies


Do you ever just have the urge to throw a bunch of random ingredients into a cookie and see what happens? Well, that was me yesterday. I wanted something chocolatey and I wanted a cookie. But, I also wanted peanut butter, Oreos, sprinkles, and potato chips. From these cravings came a cookie that I am pretty much addicted too. I call it the Chocolate Junk Cookie. Allow me to introduce you...


I've already eaten close to 12 in the past 2 days. Good thing I'm giving these things away tomorrow, huh? I know that calling something you bake junk may not be the best title possible, but I felt it appropriate in this case. I literally rounded up a bunch of "junk", threw it into my mixing bowl and created this cookie.


I realize in the cookie war, there are "crunchy" people and "chewy" people. I tend to hang out more on the chewy side, as I really enjoy soft cookies. These definitely are more for the chewy lover. Inside is super soft and almost cake-like, while the outside is firm but not crunchy. Dunk em in milk, and say mmm!


Chocolate Junk Cookie
2 1/2 cups all-purpose flour
1 teaspoon baking soda
1/2 teaspoon salt
3/4 cup cocoa
1 cup unsalted butter, at room temperature
1 cup granulated sugar
1 cup dark brown sugar
2 large eggs
1 tablespoon vanilla extract
½ cup white chocolate chips
½ cup peanut butter chips
1 cup semi-sweet chocolate chips
1 cup chopped Oreos
1/3 cup crushed potato chips (I used Ruffles)

Preheat oven to 375 degrees F. Line your baking sheet with parchment paper. 
In a medium sized bowl, sift flour, baking soda, salt, and cocoa. With a standard or hand held mixer, cream butter and sugars together until creamy and smooth. Add in eggs, one at a time. Add in vanilla extract.
Add flour mixture to mixer a 1/2 cup at a time and mix until flour disappears. Stir in white chocolate and semi sweet chocolate chips, peanut butter chips, potato chips, and Oreos. Drop cookie dough by rounded tablespoons onto baking sheet, about 2-3 inches apart.
Bake cookies for 8-10 minutes. Allow cookies to sit on baking sheet for 5 minutes after removing from the oven. Transfer cookies to a cooling rack and cool completely.

Dipping Chocolate
6 oz semi-sweet chocolate (I used chocolate chips)
1-3 tablespoons vegetable shortening
Rainbow sprinkles

Melt chocolate in microwave with 1 tablespoon shortening in 30 second increments. Add shortening as needed to reach desired texture. Chocolate should be smooth and shiny. Allow chocolate to cool for 10 minutes before using.

Dip cookie in chocolate, transfer to parchment or wax paper and cover chocolate coating with rainbow sprinkles. Allow chocolate to cool and set before transferring to air tight container (I put parchment paper between each cookie layer).


Wednesday, March 20, 2013

Loaded Baked Potato Salad


The week after spring break...and I am drained. Why we had our spring break a week before the first actual day of spring is beyond me, but that is another conversation entirely. Having a week off is like 3 years in kindergartner time. They come back well rested, but in the span of a week they forget every classroom rule ever preached to them. Quiet time does not register well to 5 and 6 year old children, to say the least. I feel like I should just invest in a parrot that can speak "be quiet, stop talking, level 0" and save my voice the trouble throughout 60% of my school day. 

Don't get me wrong, my students are adorable and I love each of them dearly. However, I have never in my life hated my last name so much. I took a tally one day, just to see how many times a day I hear my name. The grand total? 356 times in an 8 hour period. That averages out to 44.5 times an hour that I heard "Miss Poehl". Which ultimately means I heard my name almost every 2 minutes for 8 hours straight. I guess it is a good thing my last name changes in less than 7 months - at least until next years class repeats Mrs. Onweller 15 million times. Do me a favor, imagine 20 little ones saying your name that many times in a hour. And people think we just play with kids all day? Not so much. Kindergarten ain't what it used to be, trust that. I was making Marconi necklaces and finger painting back in my day. In today's world, kindergartners are expected to be reading and writing legit sentences, as well as adding and subtracting. That is just the beginning.

Okay, teacher rant over! On to the potatoes. I love potatoes. I love them even more when they are drowning in a sea of sweet cream butter, sour cream, scallions, cheese, and BACON. I can't even put into words the amount of love I have for bacon. Fried bacon, chocolate dipped bacon, bacon burgers, BLTs, bacon wrapped shrimp, bacon wrapped jalapenos, bacon wrapped chicken, bacon cupcakes. I could go on, but then I would have to put this blog post in chapter book format. Get the point yet? I love bacon.

Wright's bacon is the only one I will purchase now. If you haven't yet had the chance to experience it - go out, buy it, eat it, love it. I am obsessed. 
I reccomend the Applewood or the Peppered bacon. GO BUY IT!

Introducing....Loaded baked potato salad! It is like a loaded baked potato, but mushed up into the best potato salad I have tasted in 26 years of life.


Loaded Baked Potato Salad
Adapted from Dishing with Leslie

4 large potatoes (I used Russet)
1/3 cup mayonnaise
1/2 cup sour cream
1 cup shredded sharp cheddar cheese
1/2 cup chopped chives (more for garnish)
5-8 strips of bacon cooked and crumbled
1 tsp black pepper
1/4 tsp red pepper
1/4 tsp salt to taste (or more if you prefer)

In a small bowl, mix together mayonnaise and sour cream. Add chives, cheese, and pepper, and salt. Chill mixture in refrigerator for at least 30 minutes. In the meantime, peel and cube your potatoes and add to a large stock pot. Cover with water and boil for 15-20 minutes (or until potatoes are fork tender). About 20 minutes. Be sure not to over boil! 

Drain potatoes and allow 10-15 minutes of cooling time (more if you are going to serve potato salad chilled, I did). Put potatoes in a large bowl and combine with the sour cream mixture. Fold in crumbled bacon, or sprinkle over the top of salad. Garnish with remaining chives.


Sunday, March 3, 2013

Samoa Brownie Truffles


Let me just start by saying that this weekend has been a baking nightmare. Have you ever set your heart on making something but no matter what you do, or how many different ways you try to do it, nothing seems to go your way? Well, that was me all weekend long! Let me explain...

I had a box of Samoa girl scout cookies (my favorite!), and I thought it would be smart to bake something with them for the sake of getting them out of my kitchen. I have a small obsession, and when there are Samoa cookies within a 3 mile radius, I will find them and eat them all. I randomly got the craving for slutty brownies. You know, the chocolate chip cookie, Oreo, brownie layered bars from heaven (or hell, depending on the number of sizes your pants increase after eating them.) I decided to put two of my favorite things together and try to make slutty Samoa brownies, using Samoa cookies instead of Oreos in the middle. Seems like a great idea, right?

Wrong. My first mistake was buying ultimate fudge Godiva brownies. My second mistake was not thinking about what the caramel on the Samoa cookie would do when baked in the oven under a layer of those fudge brownies. This terrible combination prevented the brownies from hardening into a cake like texture. I cooked them for 30 minutes more than directed and still had firm but mold-able fudge instead of brownies. I even cooked them an extra 15 minutes, no change. To avoid burning the chocolate chip cookie layer, I had no choice but to take them out. The good news is that the corners of the pan, some of the edge pieces, and areas without large pieces of the Samoa cookies did actually hold a cake-like substance. This is how those turned out:


Even though I only ended up with a few pieces that baked correctly, I must say that they were really good. It makes me sad that the whole pan did not turn out the same way :(

Had things gone my way, I probably would have filled the blog full of pictures like this one.

No such luck. But, I refused to throw away the rest of the tasty, yet over fudge-like pieces that remained. Hence came the creation of my "Samoa Brownie Truffles". I pretty much rolled pieces into little balls, dipped them in chocolate, and sprinkled them with toasted coconut.


For those of you brave enough to try the Samoa slutty brownies, here you go:

Samoa Slutty Brownies
Adapted from Kevin and Amanda

1 cup (2 sticks) butter, softened
1 cup granulated sugar
3/4 cup light brown sugar
2 large eggs
1 Tablespoon pure vanilla extract
2 1/2 cups all-purpose flour
1 teaspoon baking soda
1 teaspoon salt
2 cups (12 ounces) milk chocolate chips
1 pkg Double Samoa cookies
1 Family Size (9×13) Brownie mix


Preheat oven to 350 degrees F. Cream the butter and both sugars in a large bowl with an electric mixer on medium speed for 3-5 minutes. Add the eggs and vanilla and mix well to thoroughly combine. 

In a separate bowl, whisk together the flour, baking soda and salt, then slowly incorporate into the mixer until the flour is just combined. Stir in chocolate chips. Spread the cookie dough in the bottom of a 9×13 baking dish that’s been lined with wax paper and sprayed with cooking spray. Top with a layer of Samoas. 

Mix together brownie mix. Pour the brownie batter over the cookie dough and Samoas. Cover with foil and bake at 350 degrees F for 30 minutes. Remove foil and continue baking for an additional 15-25 minutes. Let cool completely before cutting.


Chocolate Ganache

9 ounces bittersweet chocolate
1 cup heavy cream
Toasted coconut

Place the chocolate in a medium bowl. Heat the cream in a small sauce pan over medium heat. Bring just to a boil. When the cream has come to a boil, pour over the chopped chocolate, and whisk until smooth.

After allowing 15 minutes for ganache to chill, dunk truffles until coated and transfer to wax paper to set. Sprinkle toasted coconut on top if desired. Store in refrigerator.


Sunday, February 24, 2013

Chocolate Covered Strawberry Cupcakes


As promised, I am keeping up with this blog of mine! We have 17 days until our engagement picture shoot. I am a borderline starting to panic because 1.) I have not dropped the weight I wanted too, 2.) I still have no idea what I am wearing for it, and 3.) we are doing a stylized picnic scene for the first half of the shoot, and I can't seem to decide what I want it to look like. Allow me to explain:
  • I have lost 5lbs, which I am not complaining about. However, I want to drop 10 more before our pictures, and it isn't looking like that is going to happen. For the life of me I couldn't find the motivation to workout after work - until a recent trip to the mall. I am tired of seeing cute sleeveless dresses and never buying them because I hate my arms. I call my arms turkey legs. You know, the things you buy at the fair? My arms look like the round ends of those. So, I have finally found the motivation I needed! I am going to cut out processed foods and begin working out at least 4 days a week. I may not get the results I want for out engagement pictures, but you better believe I will get them by the time our wedding gets here!
  • I have ordered 4 different dresses online and have sent them all back. I keep searching for the perfect engagement session outfit and hating everything once I receive it. I think at this point I have discovered two things - I don't look good in ivory/white, and I really need to start a water and air diet. On a happy note, I went to the mall on Friday, and I think (fingers crossed) that I finally found something I like! '
  • A stylized shoot is where you have props set up for your pictures. I have several things to use for a picnic style set up, but keep stressing myself out trying to figure out what I want to use and how I want it set up. Leave it to me to complicate even the simplest things!
I am the queen of planning ahead, so winging anything is nearly impossible for me to handle. The same can be said for our engagement shoot. I have planned so much that I am going crazy. I just want to get beautiful pictures that we love for the rest of our lives. Being a perfectionist is really a horrible way to be more often than not. 

I realize I am a week late here, but I felt like baking something Valentine's Day-ish. What could be better than a chocolate covered strawberry cupcake?! These are rich and really taste like an actual chocolate covered strawberry. I've outdone myself folks!


Chocolate Covered Strawberry Cupcakes

I chose to use my own personal chocolate cupcake recipe (sorry kids, not sharing that today). Go ahead and use your favorite chocolate cupcake recipe or feel free to use this recipe from My Baking Addiction.

1 (18.25 ounce) package devil’s food cake mix
1 (5.9 ounce) package instant chocolate pudding mix
1 cup sour cream
1 cup vegetable oil
4 eggs, lightly beaten
2 teaspoons pure vanilla extract
1/2 cup warm water

Preheat oven to 350 degrees F. Line muffin tin with paper liners or spray with non-stick cooking spray.
In the bowl of a standard mixer, fitted with the paddle attachment, or with a hand mixer in a large bowl, beat together the cake and pudding mixes, sour cream, oil, eggs, vanilla and water. Beat for about two minutes on medium speed until well combined.
Using a large cookie scoop, distribute the batter between 24 muffin wells; about 3 tablespoons of batter per well.
Bake in preheated oven for 18-22 minutes or until a toothpick entered into the center of a cupcake comes out clean. Allow cupcakes to cool inside muffin tins for about 10 minutes. Remove cupcakes from muffin tins and allow to fully cool on a wire rack. Once cupcakes are cool, prepare your frosting.

Strawberry Buttercream Frosting
3 sticks unsalted butter, room temperature
4-5 cups powdered sugar
2 teaspoons vanilla extract
1/4 cup pureed strawberries

In the bowl of a standard mixer fitted with the paddle attachment, beat the butter on medium-high speed. Gradually add in the powdered sugar until completely incorporated. Add in vanilla and strawberry puree, mix until incorporated. Pipe frosting onto cooled cupcakes.


Friends, feel free to frost your cupcakes and stop at this point. The next step in my cupcakes is where the process gets sticky...literally. But, if you really want the chocolate covered strawberry taste and feel, this step is necessary. It is a pain, and it is messy - fair warning.

Chocolate Coating
12 oz semi-sweet chocolate, finely chopped
3 tbsp canola oil

Melt the chocolate and oil together in a microwave safe bowl for 30 second intervals, stirring after each interval. Pour chocolate into a wide and short cup. The cup should be wide enough so that you can dip the cupcake inside without touching the sides. Allow the chocolate to cool for 15 minutes after heating.

Take a cupcake, turn it up-side-down, and steadily dip it down into the chocolate up to the point with the frosting meets the cupcake. Pull it straight out of the chocolate, allowing the extra chocolate to drip off into the cup.  Turn the cupcake right-side-up and place it on the wire rack.  The frosting should be completely covered with chocolate but if any shows, use a knife to drizzle some chocolate into the spots where the frosting shows.  Repeat with remaining cupcakes.  Allow the chocolate coating to set-up – this can be done at room temperature or in the fridge for 15 minutes (My frosting did not keep its piping shape, which was quite sad for me. You may want to allow more cooling time than this).

* I chose to keep mine in the refrigerator, as I prefer the taste more this way!


Sunday, February 17, 2013

Brown Butter Nutella Stuffed Chocolate Chip Cookies


So far, so good - I am posting again after only a week! No applause necessary friends. It feels good to be back into the blog world. I was telling a friend today how time consuming blogging can be. Although it is tough to make time to post, it is worth it! Time for hobbies is hard living life as a teacher. There are so many things I want to do, but I have no idea when to do it! I'm sure many of you are thinking "Yeah right, teachers get weekends off and tons of breaks!" True to some degree, but at least a few hours of every weekend is spent lesson planning or preparing something for my classroom. Usually, any extra time I have on the weekends is spent trying to have fun outside of the house or relaxing as much as possible to rejuvenate for the upcoming work week. My weekends seem to fly by faster and faster. Where does the time go?

I have found myself missing having a true hobby. Seems lately all I can manage to do is work and wedding plan. When I first started this blog, I was cooking and baking so often that Ryan and I were putting on weight as a result. However, my new plan is to make things and bring leftovers to work. That way, my hobby can live on without my jeans losing the ability to buckle! Speaking of jeans buckling, we went to the Florida State Fair yesterday and ate our weight in food. Here is what we enjoyed in no particular order:
  • Honey Bunches of Oats fried chicken on a stick
  • Bacon wrapped tator tots
  • Steak tips with mushrooms, peppers, and onions
  • Buttermilk corn dog
  • Fried PB n' J on a stick
  • Fried Oreos
  • Chocolate dipped bacon
  • Krispy Kreme doughnut burger
  • Mac n' cheese burger
  • Peach sweet tea
P.S - The sweet tea at the fair is my all time favorite. I wait a year for this stuff! You can see in the below picture that I'm not playing. We do it by the jug, and refilled many times throughout the day.


Thank the lord 3 of us split everything while at the fair and we did not eat all of this on our own. I managed to not gain weight yesterday. However, I'd be willing to bet that my cholesterol is at max-capacity. You would think I'd be in the gym right now after that bad of a binge, right? Wrong. Here I sit, melting into my couch with a glass of sweet tea. I have managed to lose 5lbs simply from dieting and eating small portions in the past 2 weeks, but I am pretty far off from my wedding dress goal. In a perfect world, I want to lose about 20lbs total. It would help if I could motivate myself to work out regularly...or once a week even. The problem is that I drive too far for work to wake up and workout in the morning (I'd be getting up at 4am, no thanks.) By the time I get home from work, I'm so exhausted that I just want to relax. First world problems, I know. I really need to get it together, we are paying too much for wedding pictures for me to feel gross in them! Ryan and I have made a promise to workout together 5 days a week starting tomorrow, so hopefully that helps. Our engagement session is 3 weeks away - we are getting close! 

Valentine's day was a success even with my classroom reaching an all time sugar high. I came home to a doorway full of Valentine's day decor, a sweet card, and my favorite flowers followed with a sushi dinner. We decided to keep it low-key this year because we are saving for the wedding. As of the 18th, our wedding is 8 months away. It will be here before we know it. Our 2 year anniversary is on the 19th, I can't believe how fast the time has flown by in our relationship!

The past weekend was a stressful one. During my lunch break at work on Friday while scanning through Facebook, I found out my step dad was in ICU and undergoing emergency surgery. I was truly panicked, so I left and headed to the hospital to find out what was going on. He suffered 2 blood clots in his leg and a few small embolisms in his lungs. Thank God he caught it early enough and went to the hospital. It was a very scary time, and it was hard to see him hooked up to machines. I am just so blessed and thankful that prayers were answered and everything turned out to be okay. The surgery successfully removed the clots and the doctors believe he will be just fine.

Although things have been somewhat crazed lately, I still managed to make some sinfully delicious chocolate chip cookies. As if the chocolate chip part wasn't enough, they are stuffed with Nutella. Yes, for real.


Brown Butter Nutella Stuffed Chocolate Chip Cookies with Sea Salt
Recipe adapted from Thebitesizedbaker

2¼ cup all-purpose flour
1¼ teaspoons baking soda
¼ teaspoon of salt
2 sticks (1 cup) unsalted butter
1¼ cup packed dark brown sugar
¼ cup granulated sugar
1 large egg plus 1 egg yolk
1½ teaspoons vanilla extract
1 tablespoon plain greek yogurt
½ cup semi-sweet chocolate chips
½  cup milk chocolate chips
1 jar of Nutella, chilled in refrigerator
Course sea salt for sprinkling

In a large bowl mix flour, baking soda, and salt until combined. In a saucepan over medium heat, brown butter and set aside to cool. (How to brown butter)

In the bowl of a stand mixer with the paddle attachment, beat together butter and sugars until light and fluffy. Mix in egg, yolk, vanilla, and yogurt until incorporated. Gradually add the dry ingredients until combined. Fold in chocolate chips.

Place cookie dough in the refrigerator for 2 hours to let the flavors meld together.

Preheat the oven to 350 degrees F. Roll 1½ tablespoons of dough and flatten the dough to make a flat circle. Place 1 teaspoon of chilled Nutella in the middle then place another flat circle of cookie dough on top. Crimp edges to seal.

Place dough balls on cookie sheet, 2 inches apart and bake 9-11 minutes or until the edges turn golden brown. Sprinkle with sea salt and let cool on wire racks.


Friday, February 8, 2013

Cookie Crumb Cupcakes


"Aries motto is "Ready, fire, aim!" It may be backwards for others, but you'd rather figure out what to do while you are doing it. Impulsive actions, however, can bring you your share of trouble. While others are gathering information to make informed decisions, you are already on your way. As such, you could suffer from false starts. In fact, you Aries are so good at starting things that you can be off onto your next project before completing the previous one."

So, those who know me know that I am very into zodiac signs and astrology. To say that I am a textbook definition of an Aries female would be an understatement. For years I have always read how Aries are the first to start something, but never finish or keep up with it. Naturally being stubborn, I refused to believe it. However, when I looked at this blog for the first time in months and realized my last post was in September, I got a rude awakening of how true that is! I guess it has been awhile, huh? Hello again blog world! The start, stop, start Aries is back in action!

The past few months have been action packed. I started a new job teaching kindergarten almost immediately after leaving my previous teaching position. I love the school staff, and have made some really great friends. However, I have an hour commute to and from work. An 8 hour day is ultimately a 10 hour day. By the time I get home, I am exhausted and cooking/baking is the last thing on my mind. So sad, right? :(

Aside from teacher life consuming my time, wedding planning had also been a major factor in my non-blogging behavior. I am thankful to be saving the money, but I definitely see why many brides hire wedding planners. There are so many endless details in planning a wedding, it is truly enough to drive someone insane. I am constantly on Pinterest, Weddinggawker, and Weddingwire. I seriously do not know what I am going to do with my time when our wedding is over. I have to say though, the time and effort is paying off. I know we are going to have an amazing wedding day. I recently found my wedding dress, and it is absolutely stunning! And on a super exciting note, we received a free (yes free) 3-day honeymoon trip to Disney World! We have 2 free 2-day park hoppers and a 3 night stay in a royal guest princess room! With Disney, dreams really do come true! Disney has my heart, always!

I have lost almost 10lbs with diet alone. I still cannot motivate myself to workout after work though. We have our engagement photo session coming up in March, so I have to get it together! Sweets should help...or not! Here is a cupcake recipe I threw together on a whim. Hope you enjoy it as much as I did! On a side note, I was in a hurry and gave one of those cake mix/from scratch ingredient recipes a try. It was tasty, but I will be sticking to my all from scratch vanilla cupcakes. Feel free to use your favorite vanilla recipe or this one:


Cookie Crumb Cupcakes
Cake adapted from Recipe Girl

1 (18.25 ounce) box white cake mix
1 cup all-purpose flour
1 cup granulated white sugar
3/4 teaspoon salt
1 1/3 cups water
2 Tablespoons vegetable or canola oil
1 teaspoon vanilla extract
1 cup sour cream
4 large egg whites

Preheat oven to 325°F. Place cupcake liners in cupcake pans.
In a large bowl, whisk together cake mix, flour, sugar and salt. Add remaining ingredients and beat with hand mixer for 2 minutes, or until well blended.
Use ice cream scoop to fill prepared cupcake tins- fill about 3/4 full. Bake about 18 minutes, or until toothpick inserted in center comes out clean.

Chocolate Ganache
9oz bittersweet chocolate, chopped
1 cup heavy cream

Place the chocolate in a medium bowl. Heat the cream in a small sauce pan over medium heat. Bring to a boil, watching carefully to avoid overflow. When the cream comes to a boil, pour over the chopped chocolate, and whisk until smooth.
Allow ganache to cool for at least 10 minutes before spreading on cupcakes (you can dip cupcakes in as well). Allow ganache to set (I give it an hour or more) before adding frosting.

Cookie Crumb Cream Cheese Frosting
1 8oz package cream cheese
½ cup unsalted butter (1 stick)
1 teaspoon vanilla extract
4-5 cups powdered sugar (or more depending on desired thickness)
2 cups cookie crumbs (I used crushed Oreos, both regular and golden)

Beat cream cheese and butter until light and fluffy with the paddle attachment of a standard mixer. Beat in vanilla extract and gradually add powdered sugar. Beat in 1 cup cookie crumbs - add more depending on your preference. 

Spread or pipe frosting onto ganache covered cupcakes. Add cookie crumbs for garnish.